Sunday, July 9, 2017

Meet The Dolls and Pets


Hi everyone, meet the dolls and pets...

 First we have Kate, a truly me doll that I got on Craigslist for $40. She has Oreo, the dog on the right. The dog on the left has not been named yet, and he belongs to Kaya.
 Next we have Kaya with Pal, who is a Palomino horse. She is a native American Indian, and you can learn more about her at americangirl.com.
 Leah June: this is not the doll of the year for 2016. She is a truly me or just like me or whatever, and she belongs to my sis. She is with Penny, Felicity's horse.
Sydney lee. She is an OG doll. I may change her name. I do not know.
Lastly, Nutmeg, Julie's pet rabbit.

~Craftgirl

Pictures of My Basically DIY American Girl Doll House -1

  1. Hi everyone...I have some pictures of my collapsible AG doll house for you, so here they are. But I do want to say that most of my AG, OG doll stuff was given to me, and some was already used. I got one doll on craigslist. I also want to say that my doll house is not perfected yet. ;)

Well,  here is the view of the whole thing. It is just two tables...with AG doll size stuff under, beside, and on them.
Here is the little storage area...I have the OG (our generation from Target, not that wonderful~cheaply made) wordrobe, and then I had some small crates, in which I have food, and shoes. I also just got the small set of plastic drawers at a yard sale. I put accessories for the dolls in them. The things on to are hats for babies or dolls, I think. The hats are from Lesotho.
Here are my two vehicles. The jeep is OG (again, not that great, one door does not close quite right). It can hold two dolls, but I am not sure if the door closes all the way when two dolls are in it.
Moving on to the horse stable...we have Penny and Pal (a palomino horse). The fence is made our of rulers and Popsicle sticks, and prestick, a thing that you are supposed to hang posters, etc up with. You can probably find it at Walmart. It is not candy. ;)I just put a rope across the gap and tied it to the table leg. The floor of the stable is a puzzle board.
The counter, or cupboard, is a box that I had. I is made out of wood. I just added a shelf from our cd rack that we are not using. The buckets are the type you could probably find at a dollar store. The hose is a jump, attached to the box with prestick.
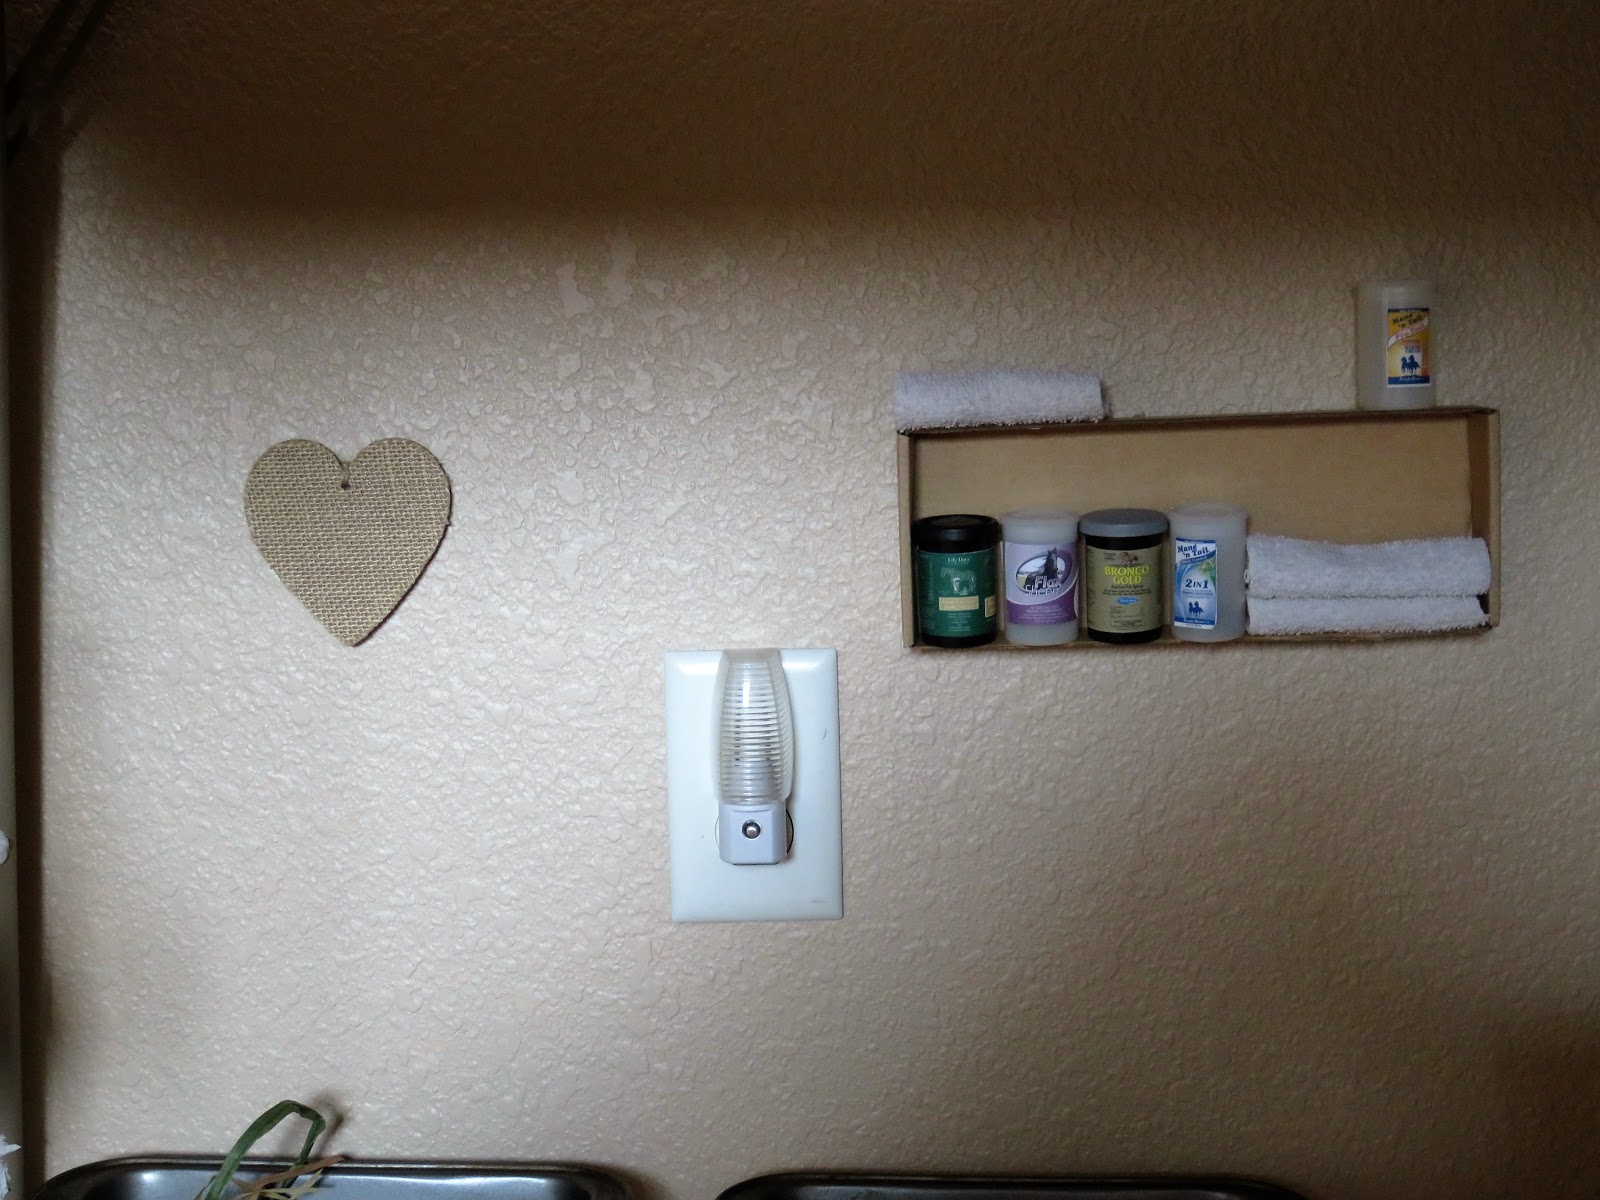
 The feeding troughs are bread pans, with blocks attached to the with, well, prestick. I put raffia inside one to look like hay. Since the wall above the troughs has an outlet, I put a night light there to cover it up, and make it look kinda like a light in the barn.
I put a heart on the wall because I am going to call the stable something to do with a heart stables, maybe. The shelf is a cardboard bok with the top cut off. I cut pieces of towel and printed out labels to put on little containers. The idea came from my froggy stuff.

The saddle and bridle are from my horses, and the whip my sis made out of some faux leather or suede strips, I think. You can probably find them at Walmart. The tack is hung on hooks that used to hold stuff on our wall. Attached...with Prestick.
 
 Now moving on to the bathroom which is a work in progress... the sink (a dessert bowl) is on a cardboard box that I have yet to finish. The tub is OG, and it belongs to my sis. The accessories are mine, and went with my tub that I used to have. The mat by the tub is from a dollhouse, and the little stand is a candle holder, which is holding a plate with tiny, real shells in it. ( at least I think they are...) The stool is from the OG wardrobe.
 The mirror is from a bird toy that broke. The wall display is blocks presticked up onto the wall and little things put (or maybe balenced) on. There is a little shell, a turtle, a real mini abaloni shell, a bottle with a map in it from an OG set, and a magnet that looks like a ship. It is like half a ship, 3d.
 This is one bedroom. The bed is actually Molly's bed. My mom and I sewed a different bedspread for it. I had the animal on the bed, and the picture is from an art class we did. I think it matches.
 The nightstand came with Kaya when a girl gave her to me. The fake plant is from playmobil, some toys that we have. The Bible is a little one that has on verse from each book in the Bible in it. It is for memorizing.
 The dog is corgi puppy, which I found on sale at amereicangirl.com, and asked for.  The dog mat is just a heart I cut out of fleece and one out of corduroy. The doggie food is from a set of little dogs I have. The tree was looking for a home, and I was glad to have it.


Craftgirl

Monday, March 27, 2017

Creating an American Girl Doll House

Most people think that to have a doll house, you have to make or buy one. But you don’t. Today I am going to tell you how to make an American Girl (or 18 inch doll) doll house from scratch. Don’t worry if you are not a carpenter. I am not either. And, this doll house is collapsible! So, if you don’t want a big doll house in your house forever (or your parents don’t) then don’t worry!  Don’t forget, when making this, to always make sure it’s okay with others if you want to use their stuff.

So first, you will need a somewhat large amount of floor space and a table if you have one. I recommend one that has space for dolls underneath it, like a card table. Well, who ever heard of a doll house without furniture? You might already have some, or you can buy some from thrift stores, stores like Target, and online. Or if you’re a penny pincher (or it’s not your birthday soon) you can make some. There are lots of tutorials online. Okay, now really, who wants a bare, boring house? Not me, or my dolls, for that matter. So, to decorate the doll house, you will need things like knick knacks, place mats, and blankets. Another option is to make some things like fake plants, if you look online. Also, if you already have some cute doll stuff like books or a computer, you can use those.

Now you can start putting it together. Of course, first you need to make sure that your floor space is clear. Then you can move your table around until you have it positioned right. After that, it’s time to decide which rooms go where. Using the furniture and decorations, you can try different arrangements. It’s okay if you move the rooms around many times. Next you can decorate the rooms. You can even add more stuff from around the house when you see that it’s needed.  Try lots of things, and be creative! Then you’re done! Yay! (Oh, wait, you have to clean up the materials you didn’t use!) I hope you have fun making this collapsible American Girl doll house!  Hopefully I can post pictures of my doll house soon. 

Thursday, July 28, 2016

Doll finds at the thrift store!!

Hi Everyone!! I have not posted in a LONG time!! One of the things that I like to do is play with 18" dolls. I will now tell you about two things that I have got at a thrift store in Fresno. The first find is a dresser for the dolls that was only $4.95(without tax):

   
This is the inside of it. Notice there is a silver thingy at the top...maybe for necklaces? maybe I will call it             a doll light. There is also a mirror, which is nice, except that the dolls are a little tall for it.


Here are the drawers, which have padding inside them.They had lint, etc., inside them, so I took my Mom's lint brush,(after asking) and I peeled off the sticky paper and used it to get the lint and stuff off. I also did this to clean the walls and stuff by the mirror.

                              
                                 This drawer might be intended be used for rings, but that is too bad...

                                             
                                                and Kaya is happy about the new dresser!!!

                                                     
                                                         ...here it is filled with stuff!!


                           Now the other piece of furniture is a bunny cage for only $2.95 (without tax).

            
              and here is the door that goes up. I cleaned the cage with Soft Scrub because I think an animal                                      may have been in it before. I also put a folded doll blanket in for the floor.


Nutmeg with his food of cut pipe cleaners in a hook and eye case.
                                                 His ball is just a small ball that we had.

                     
                        Vienna is happy about the new cage, and so is Nutmeg because he has more space.

               
                       Hope you enjoyed my post,and will start looking in thrift stores too, if you like dolls!!

Monday, August 31, 2015

A Cardboard Zoo


So yesterday I  made a cardboard zoo. It had just been a "good idea" ever since I read a book about things to make with cardboard ... and finally I made it.


Materials:  
cardboard boxes
felt
people (Playmobil, Lego, etc.) 
plastic animals
plastic canvas mesh
paper
pen
wooden sticks 
tape (duct and packing)
accessories (fences, brushes, trees, etc.)
blocks
scissors
box cutter
pom-poms
Tic-Tac
beads 
yellow pipe cleaner


Step 1:
Put the boxes in the arrangement you want. 

Step 2:
Arrange the animals so you will know how big the cages should be. 

Step 3:
Make whichever part you choose to next. I will describe each room below its picture. 


 The banner is made out of paper.  I drew the word "Zoo" on it.  
I attached it to the wooden poles with Tic-Tac, but you can use tape. 
The wooden poles are attached to the box with tape. 

Cut the gate opening.
Cut a piece of the plastic canvas mesh the size of the opening.  
Tape it to the opening with duct tape. 

The receptionist desk is just made of cardboard, folded to the right size. 
Write the fee sign and cut it to desired size.  Tape. 
Make the door for the receptionist desk and tape it on.


 The aviary is made out of the plastic canvas mesh.  I taped two pieces together and then 
taped it to the wall.  I fastened the other end with Tic-Tac, so that I could lift up the cage.  
The blocks hide the Tic-Tac and make a good viewing platform for the children. 
I cut a cardboard  wall and door for the cage (it's on the right - not visible) and taped it to the floor.


 The place for tigers and lions is simply blocks put in a good arrangement. 


 This is the back of the tiger and lion enclosure. 
 I cut little doors in between and put blue felt for water in each room.  
I added a red pom-pom for meat and a toilet paper roll for the tigers to play with. 
I taped a cardboard wall in between with packing tape.


 The kangaroo enclosure has felt for grass, a feeding trough from Playmobil with beads in it and a piece of plastic canvas mesh taped to the wall and the blocks.


 The petting zoo was the easiest.  All I had to do was stick the stuff in.  
On the right is where you get animals to pull carts with kids in them.  


 For the herbivorian, African wild life I put felt on the bottom of their enclosure, put a Playmobil fence on the edge, added trees and animals and cut up pipe-cleaners for hay. 


For the ferocious African animals, I put green felt on the bottom for grass, blue felt in a lake shape for the pond, added a divider (cardboard and packing tape) added some fake stones (real will do), added the animals and made them hilarious by putting Playmobil hay in their mouths.  


Lastly, we cut the doors wherever we wanted between the boxes and taped the boxes together. 

Now you're done. Have fun!!!


Wednesday, December 3, 2014

Nativity Scene Craft


This nativity scene craft is very cute and easy to make. 


Materials: 
13 toilet paper tubes or 5 paper towel tubes
Print out for Figures.  Find this at:  Download for Nativity Scene
Crayons or Markers
Tape
Scissors

Instructions:  print, color and cut out the figures.  Tape them around toilet paper tubes.

Note:  there are certain figures that are a little hard to do: the angel, the palm tree, and the stable.

      For the angel, cut under her wings so that they detach from the rest of her. Then tape as normal.


                     For the palm tree, cut under the bottom two leaves, and then tape as normal.


                        For the stable, wrap the sides around two toilet paper tubes, then tape.


                                                Now you're done.  Enjoy your nativity scene!